
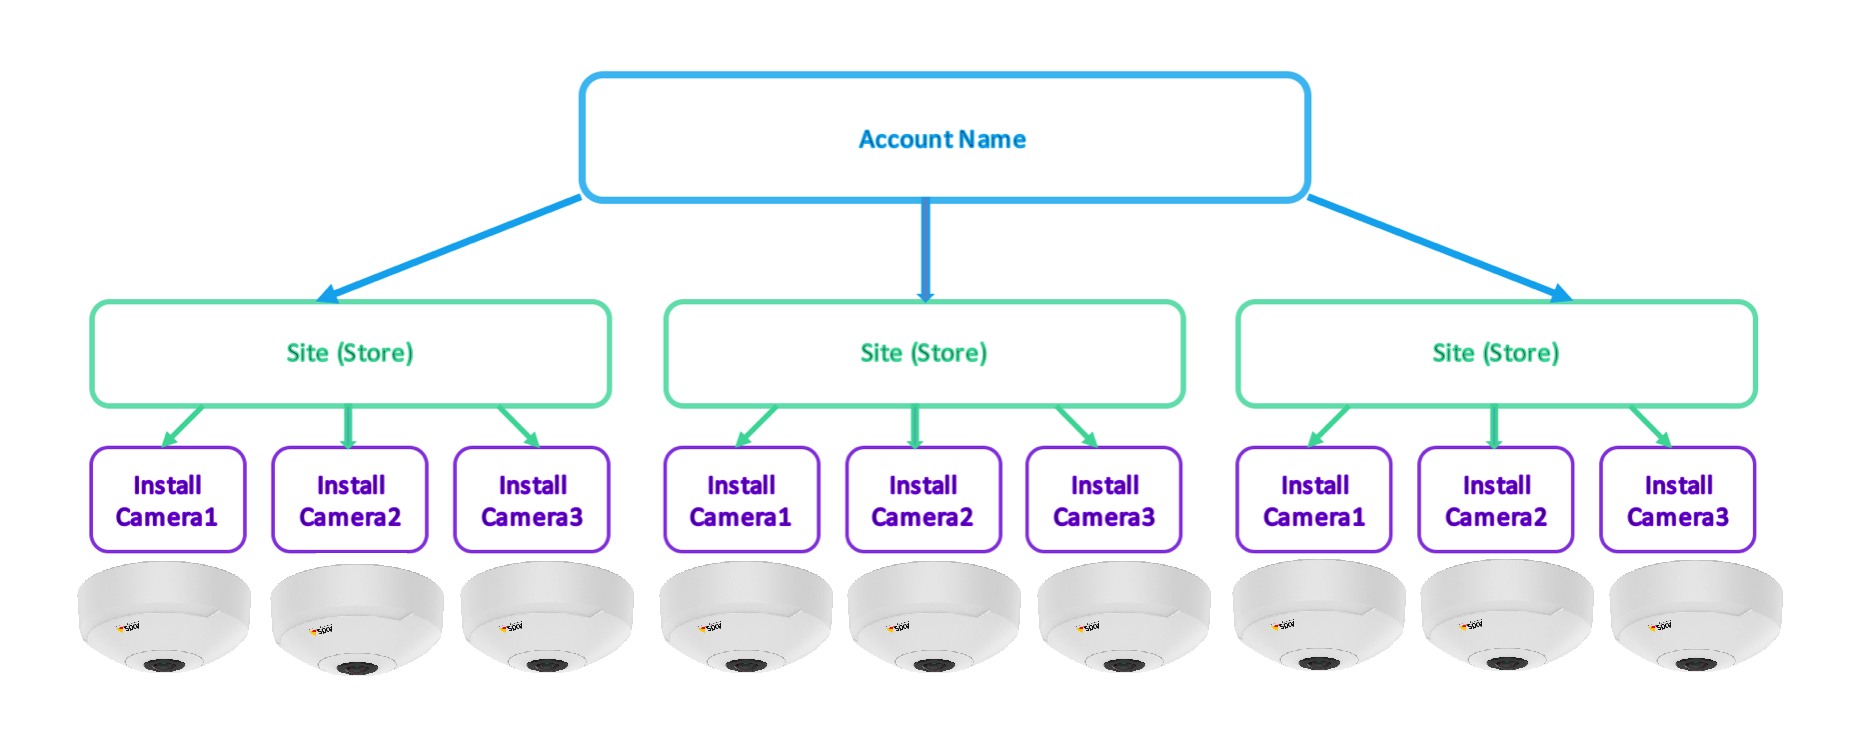
To group your cameras by store location, you’ll create Sites in the Settings tab.
In order to create a site, follow these steps:
- Click the Sites tab on the left in the Settings page, right under Cameras. When you click on Sites, it will take you to a page that will show your site's name, location, time zone, installs and cameras.
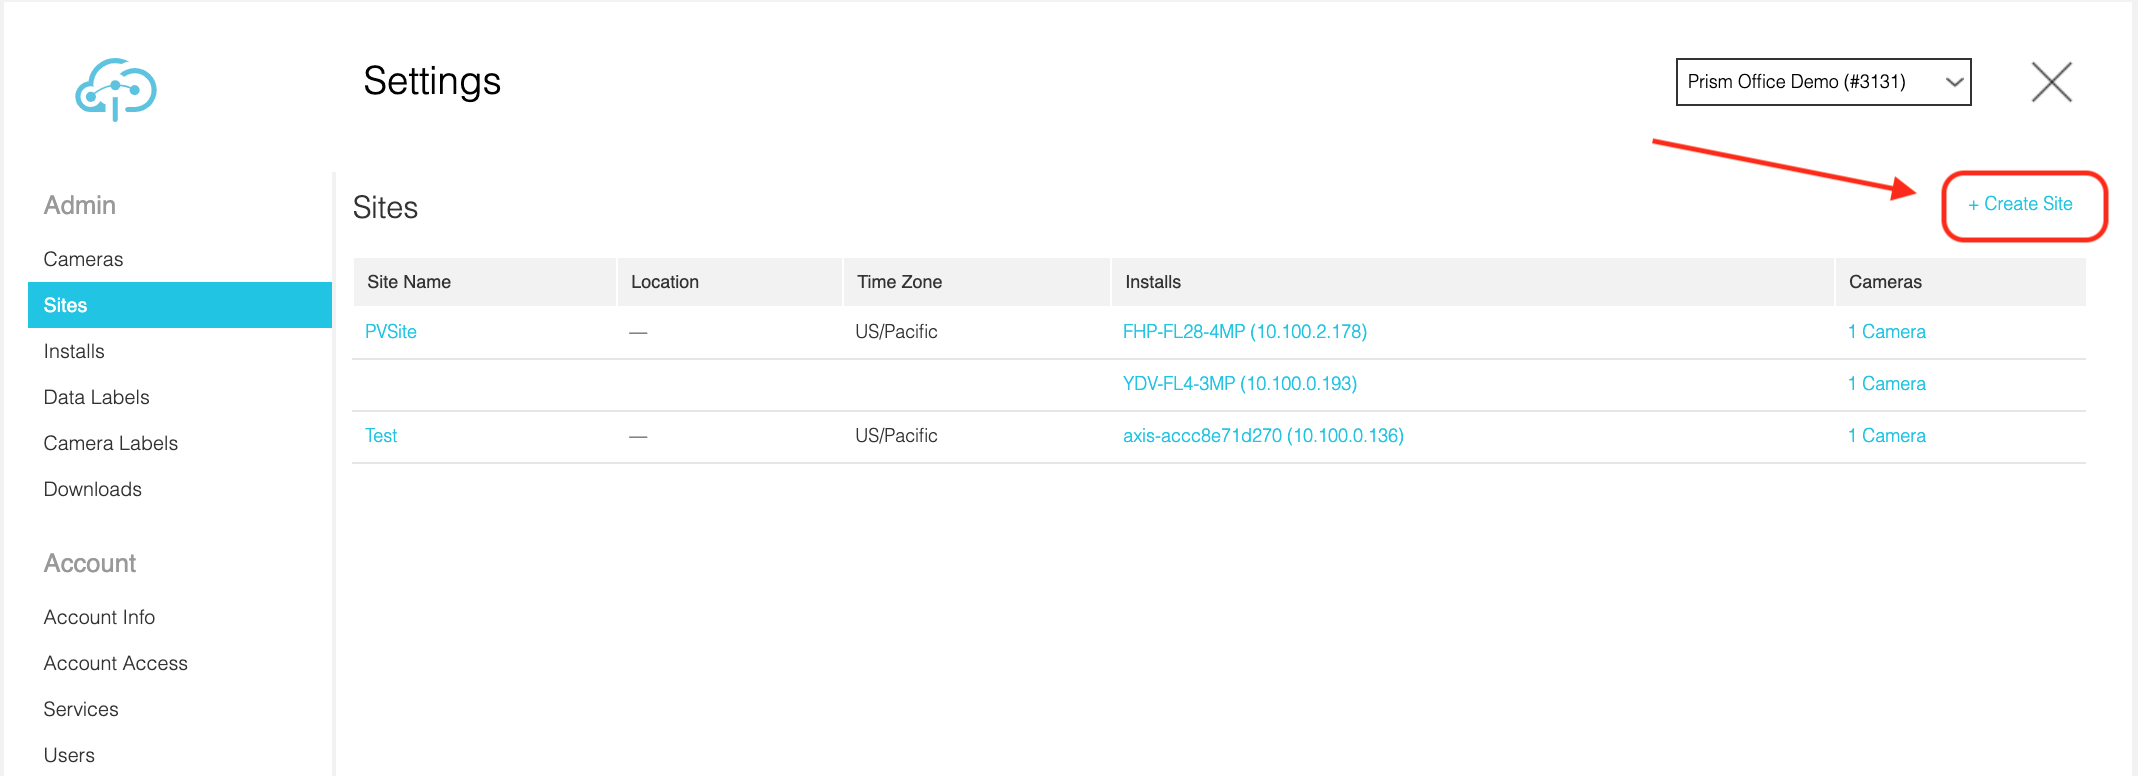
- On the top right click "+ Create Site" to create a site. Fill out the information required such as a name and time zone on the page.
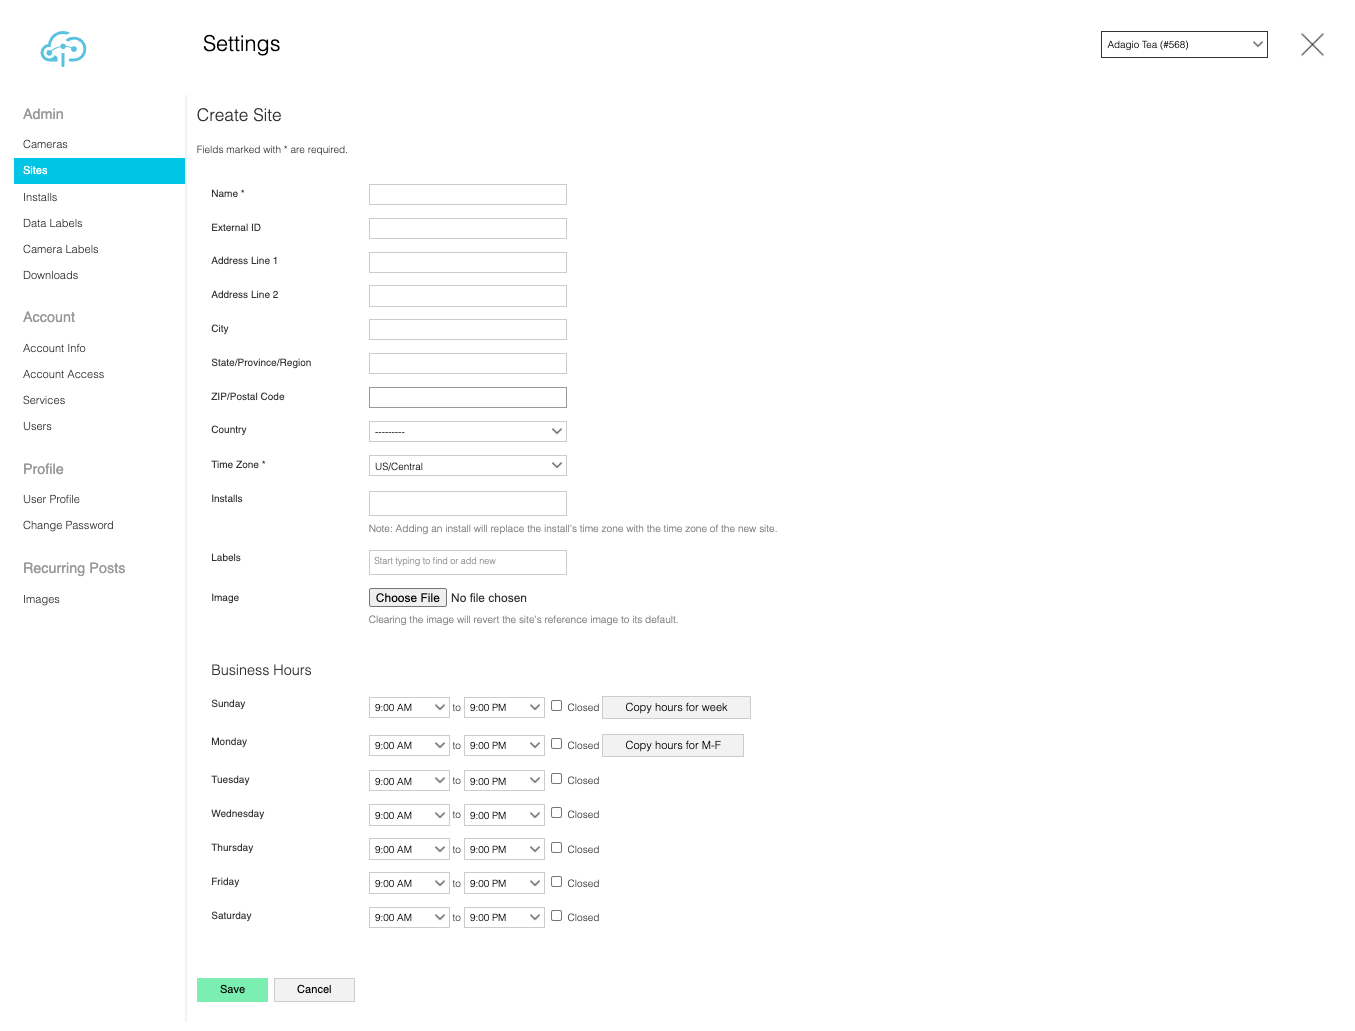
- Make sure to select an install(s) that belongs to your specified store. Note that you can attach more than one install to one site, but you cannot attach the same install to multiple sites.
- Add Labels to effectively organize your sites. Once Labels are connected to a site, you can quickly access these sites by search. You can also use Labels to modify users’ permission to access certain sites.
- If you would like to modify a users’ permission to access certain sites, click the “Users” tab in the Settings page on the left.
- Click on an existing user’s account name, or add a new user. If you click on an existing user’s account name, it will take you to the user account setting’s page.
- On the upper-right-corner of the page click “Edit this user”.
- In the Site Access section, click the “Limited” button, and under Site Labels you can modify which sites they have access to. The same steps can be repeated when adding a new user.
- After you have edited the user’s access to certain sites using the Site Labels, make sure to press the green “Save User” button at the bottom of the page. See more at Changing User Permissions.
- Add correct business hours to make sure your analytics and reports display data according to store working hours.
- Save the new site by clicking the green Save Button at the bottom of the screen.
Comments
0 comments
Please sign in to leave a comment.