The purpose of this guide is to detail all the steps needed for the physical installation of FLIR's cameras.
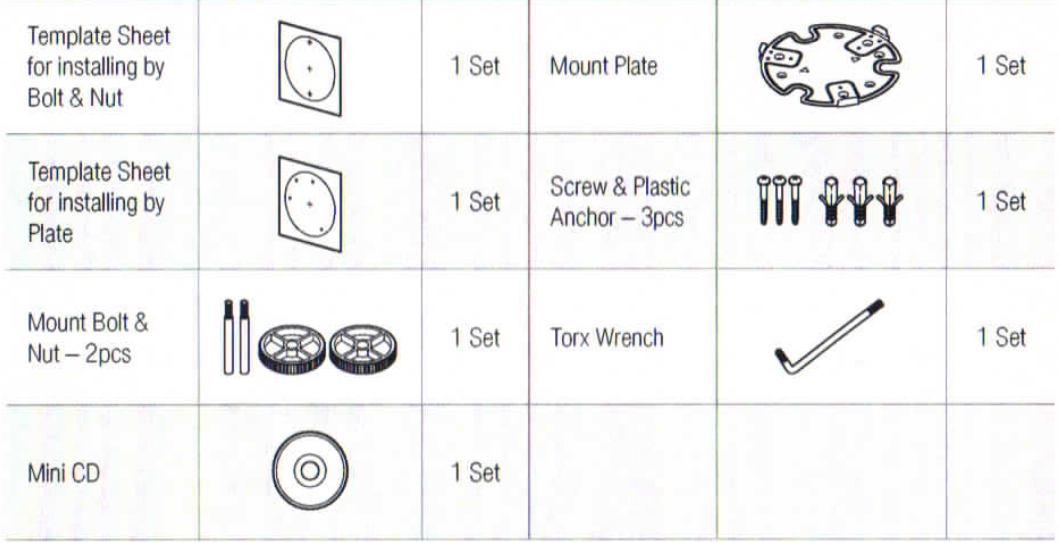
What's in the box:
Step 1. Preparing to mount the camera
-
The mounting surface must be able to hold five times the weight of your camera.
-
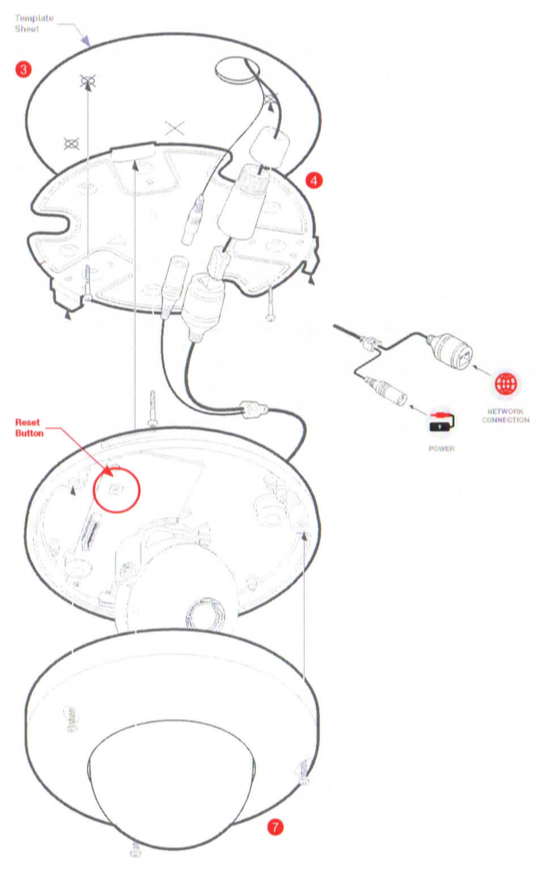
For the installation process, remove the dome cover from the camera module by loosening the three (3) screws on the dome. Use the wrench provided with the camera.
-
Using the mounting template sheet or the camera itself, mark and drill the necessary holes in the wall or ceiling.
Step 2. Cabling the camera to external devices
-
Pass the wires through and make all necessary connections.
-
If you are using a PoE switch, connect the camera using an Ethernet cable for both data and power.
-
If you are using a non-PoE switch, connect the camera to the switch using an Ethernet cable and use a power adapter to power the camera.
-
Step 3. Installing the camera
-
To use the camera's waterproof wiring:
-
Install the LAN cable into (a).
-
(b) will be assembled to (a) with a 1/4 turn.
-
Thread (c) tightly to (b).
-
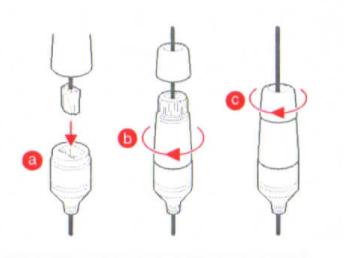
Note: To ensure a moisture seal, make sure the o-ring is in place between (a) and (b). In extreme environments, use of an outdoor-rated sealer is recommended.
Soft Surface Installation
For soft installation surfaces, use the included metal mount plate. Fix the mount plate onto the mounting surface using the included screws. Then, press the bottom case onto the mount plate. The three bezels on the case will align and snap lock onto the plate.
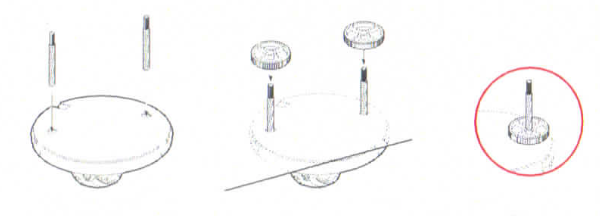
Installation Using Mount Bolt and Screws
-
Using the template sheet, make and drill the cabling holes on the wall/ceiling.
-
Secure the two long mounting screws to the camera's base.
-
Pass the wires through and make all necessary connections.
-
Mount the camera by using the 2 mounting nuts. Rotate the locking discs over the screws until the camera is held tightly from the mounting surface.
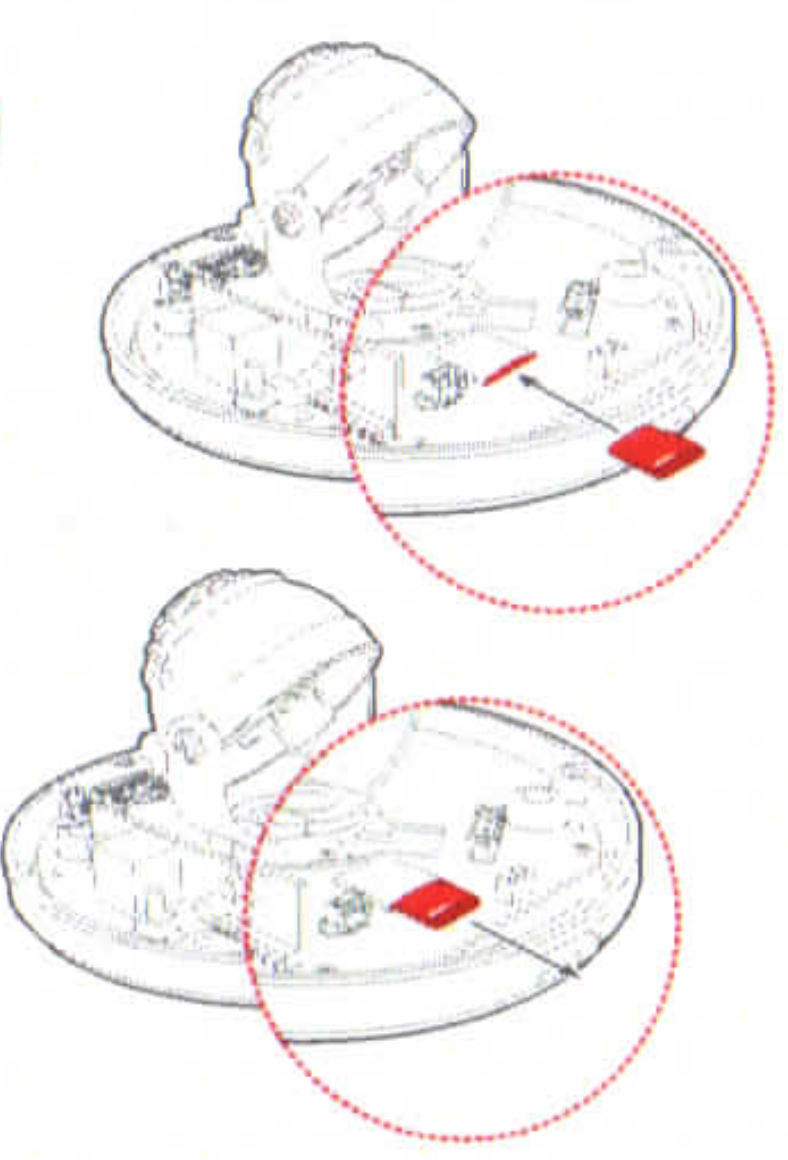
Step 4. Managing the SD card
If you wish to install or reset the SD card:
-
To install the camera's SD card, locate the SD card slot in the back of the camera module.
-
Insert a class 10 SD card into the SD card slot by pressing the SD card slot.
-
To remove the SD card, press the card inward to release from the card slot.
Comments
0 comments
Please sign in to leave a comment.