
INTRODUCTION
Ignite Prism and FLIR have teamed up to deliver a new class of camera: one with Ignite Prism Connect running directly on board. Connect to our award-winning cloud service right out of the box. It’s everything Ignite Prism has to offer – powerful analytics, mobile access, privacy protection – all available on one device. No additional hardware required.
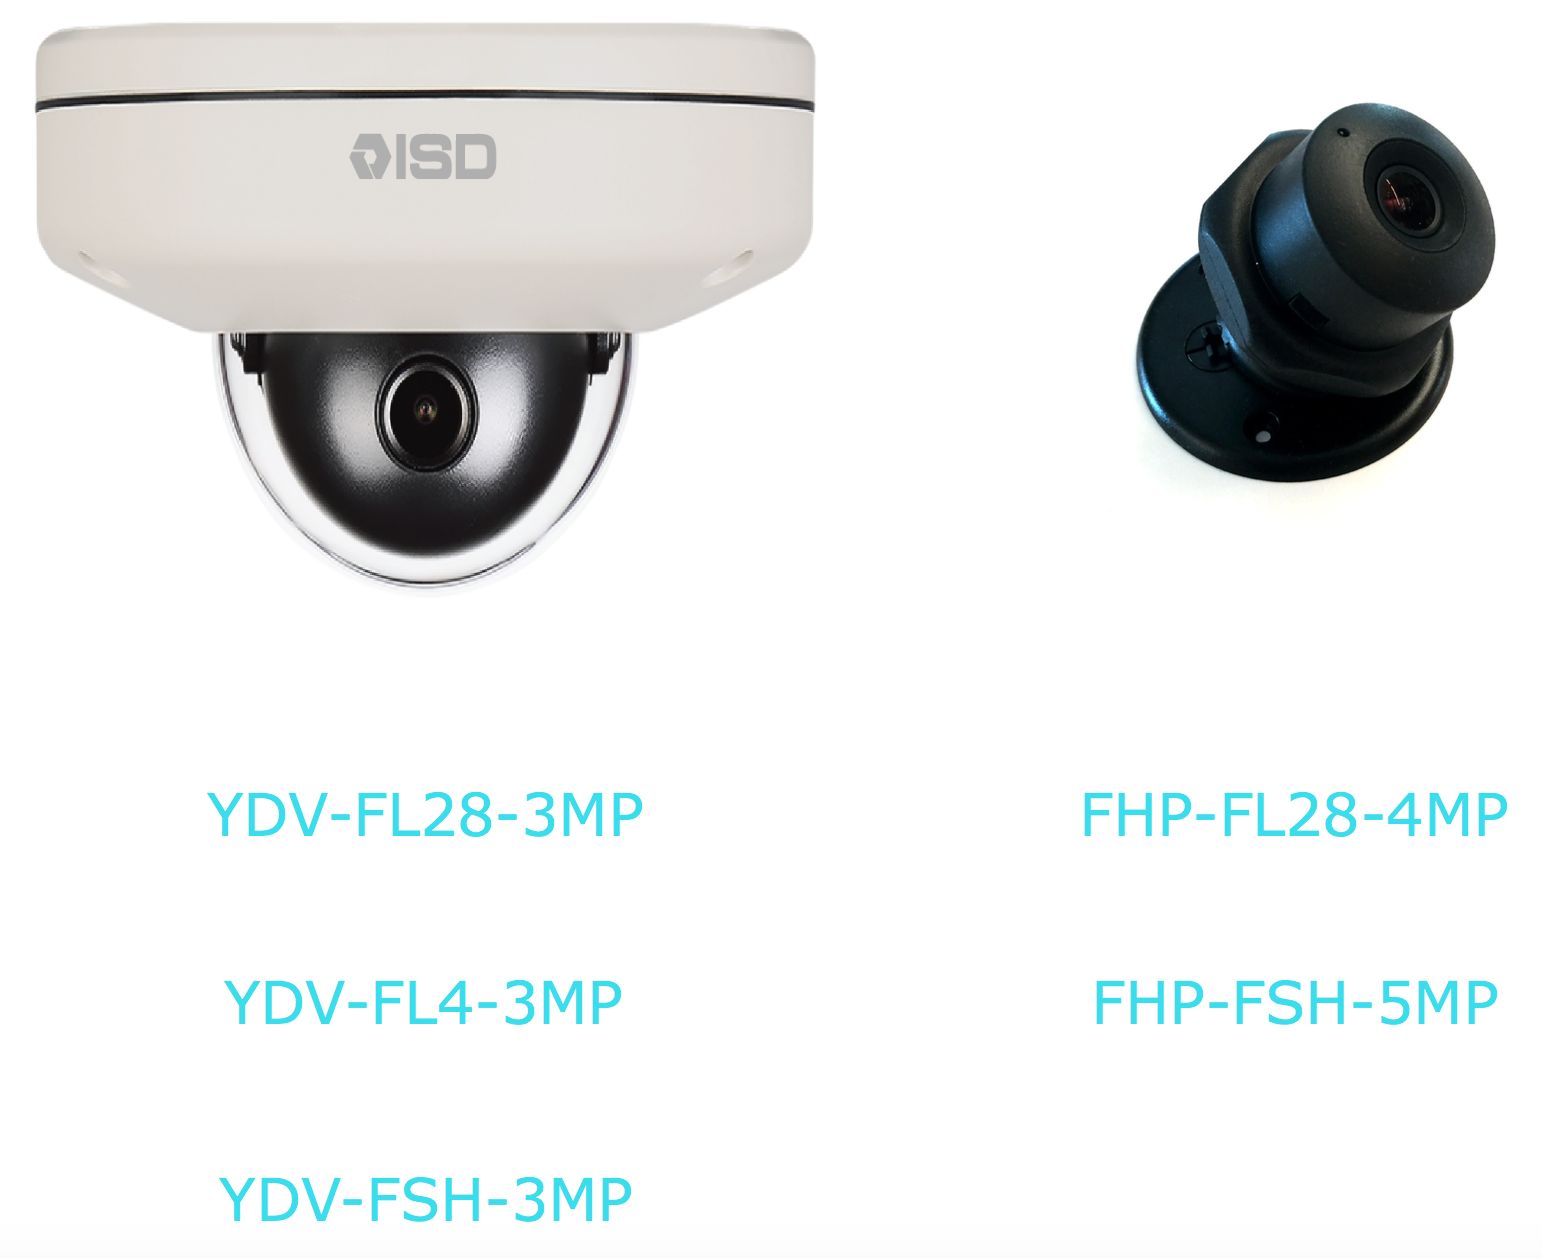
Supported camera models:
GET YOUR CONNECT CAMERA UP AND RUNNING
Already have a FLIR camera with Ignite Prism Connect pre-installed?
Once you have the camera powered up and on a network, you just need to authenticate and configure your camera with Ignite Prism.
IMPORTANT! BEFORE YOU START:
Prior to authenticating Ignite Prism Connect, make sure:
-
The camera is plugged into the local network using PoE switch/injector.
-
The PoE switch/injector should be powered on and plugged into a local
router/switch.
-
The local network on which the camera resides must be able to
communicate out to the Internet and connect to the Ignite Prism cloud service
(iapi.prismsl.net) over ports 80 and 443.
-
Micro SD card is installed.
-
The camera is set to proper date, time and time zone.
-
The camera is updated to the most recent firmware version.
-
The most recent version of Ignite Prism Connect should be installed.
Step 1: Get Ignite Prism’s Installation Token
Are you a new customer, an integrator, or just not sure if you have an Ignite Prism account? If so, just email support@igniteprism.com to set up your account or recover your user info. When your account is created, you will also receive an installation token.
If you already have an Ignite Prism customer account, just contact your Ignite Prism Account Manager or support@igniteprism.com to get your installation token.
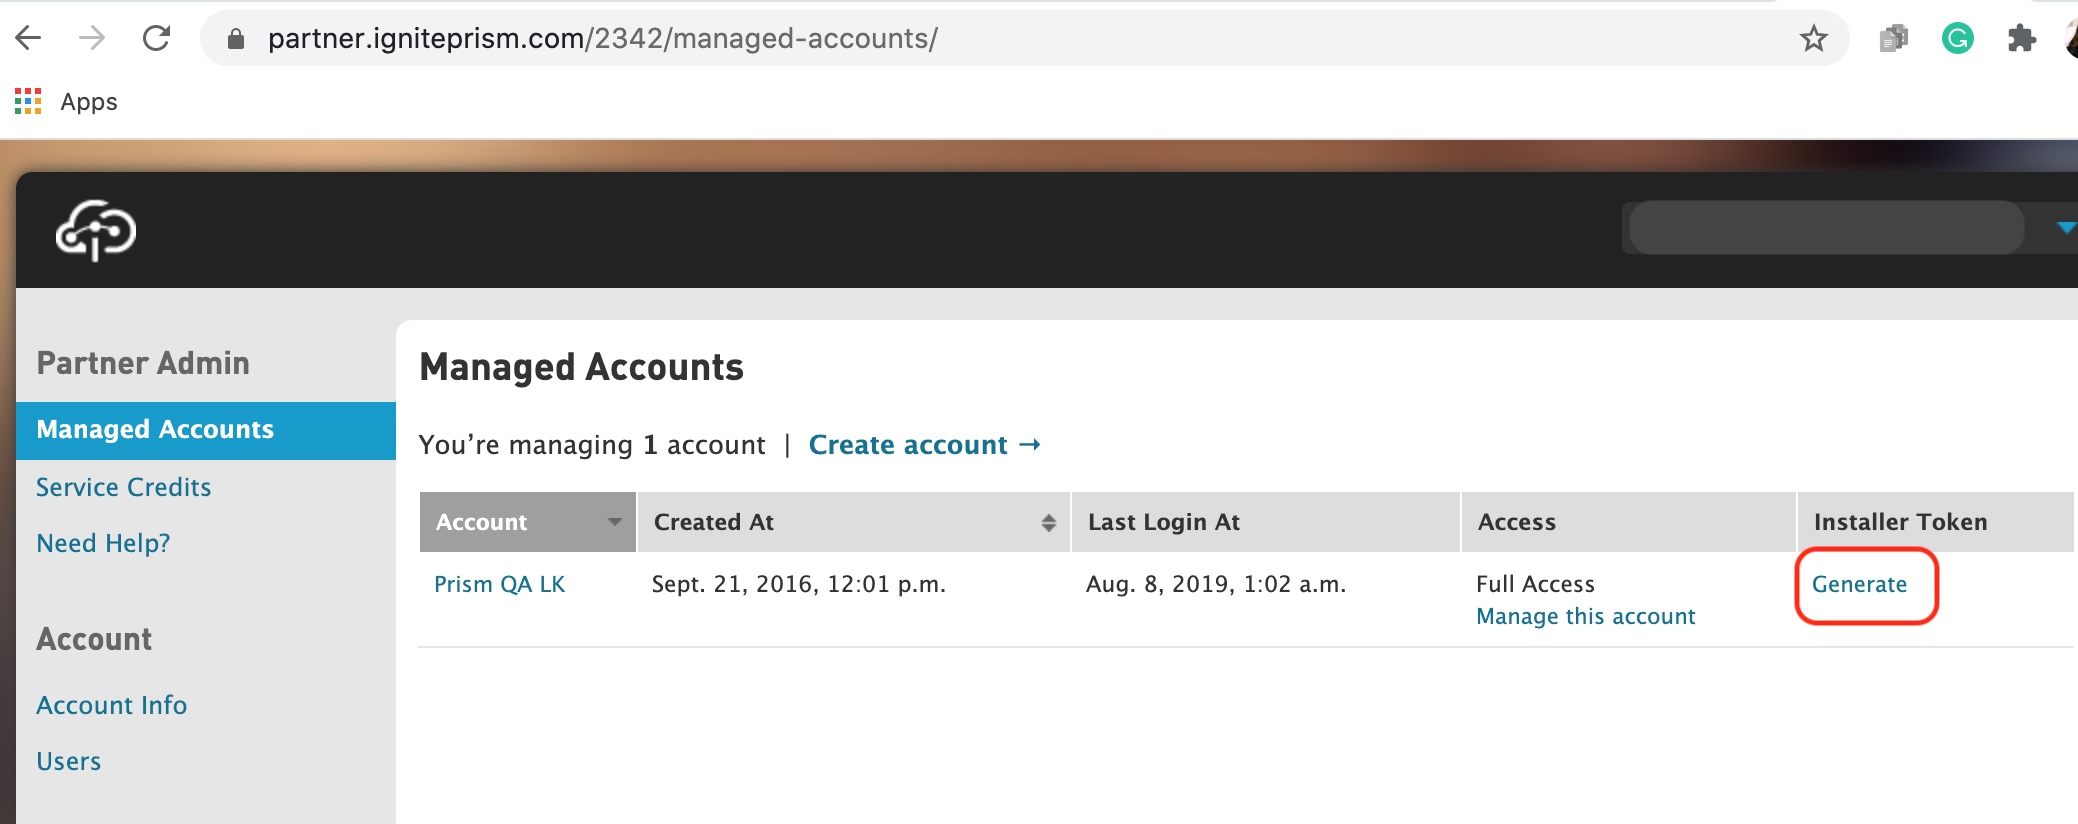
If you are Ignite Prism reseller partner, follow these steps to get your token:
-
Sign into partner.igniteprism.com
-
On the Managed Accounts page, click “Generate” on the line for the customer account for which you are installing the camera.
-
Copy the installer token that is created.
Step 2: Insert SD card
Skip this step if the SD card is already installed.
S2 (3MP) camera: remove camera dome and insert micro SD card into SD card slot. The recommended minimum size of the SD card is 32GB or more.

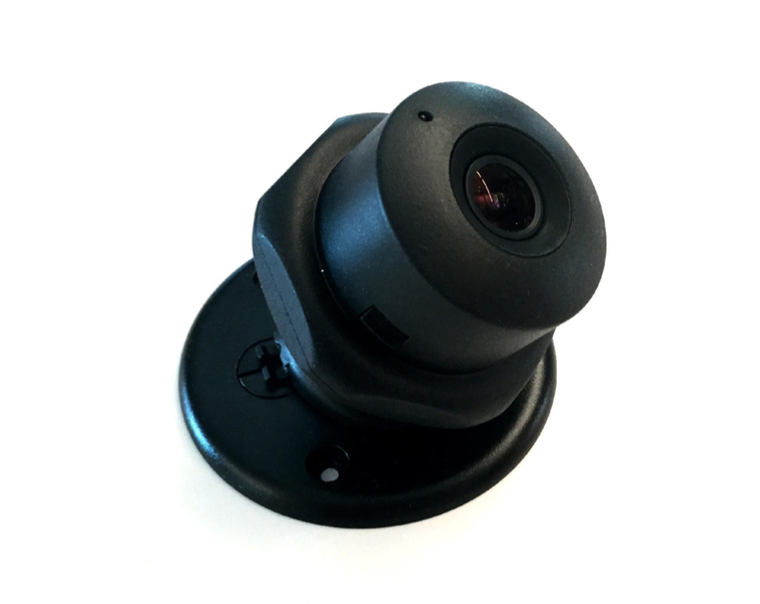
S2L (4MP) camera: insert micro SD card into SD card slot. No need to remove any parts of the camera. Minimum 32GB SD card or more is also recommended.
Step 3: Make a note of the camera’s MAC address marked on the camera.
You might need it later, as knowing the camera’s MAC address makes it easier to locate the camera on the network.
Step 4: Mount camera
To the ceiling or wall and connect it to the network and power.
Step 5: Locate the camera on the network.
Download one of these tools to locate cameras connected to the network by using their MAC addresses: Advanced IP Scanner for Windows, LanScan for Mac OS X, or any other 3rd- party network scanner.
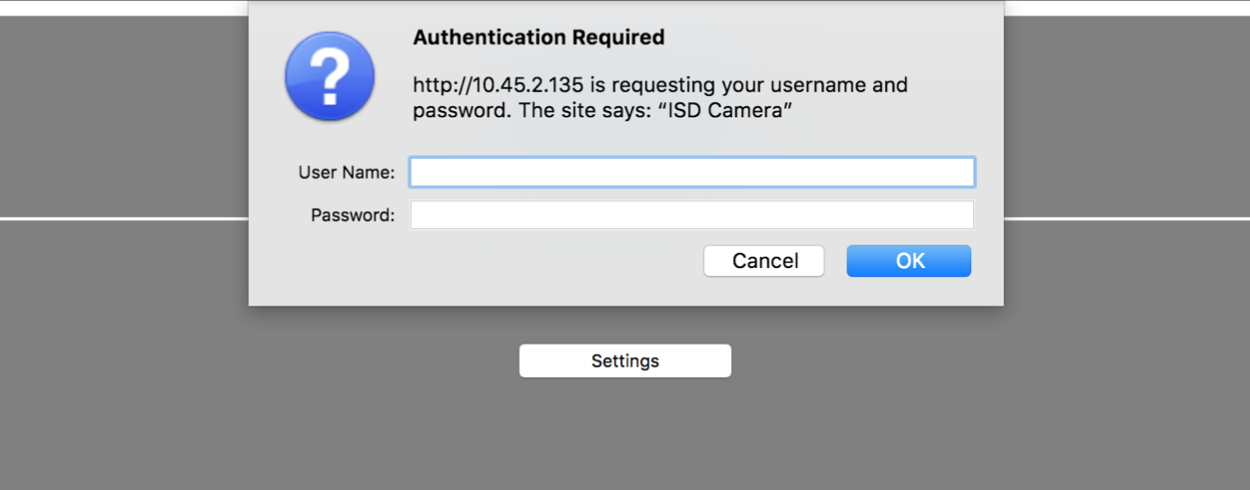
Step 6: Connect to the camera via web browser.
The default credentials for all cameras is: root/admin.

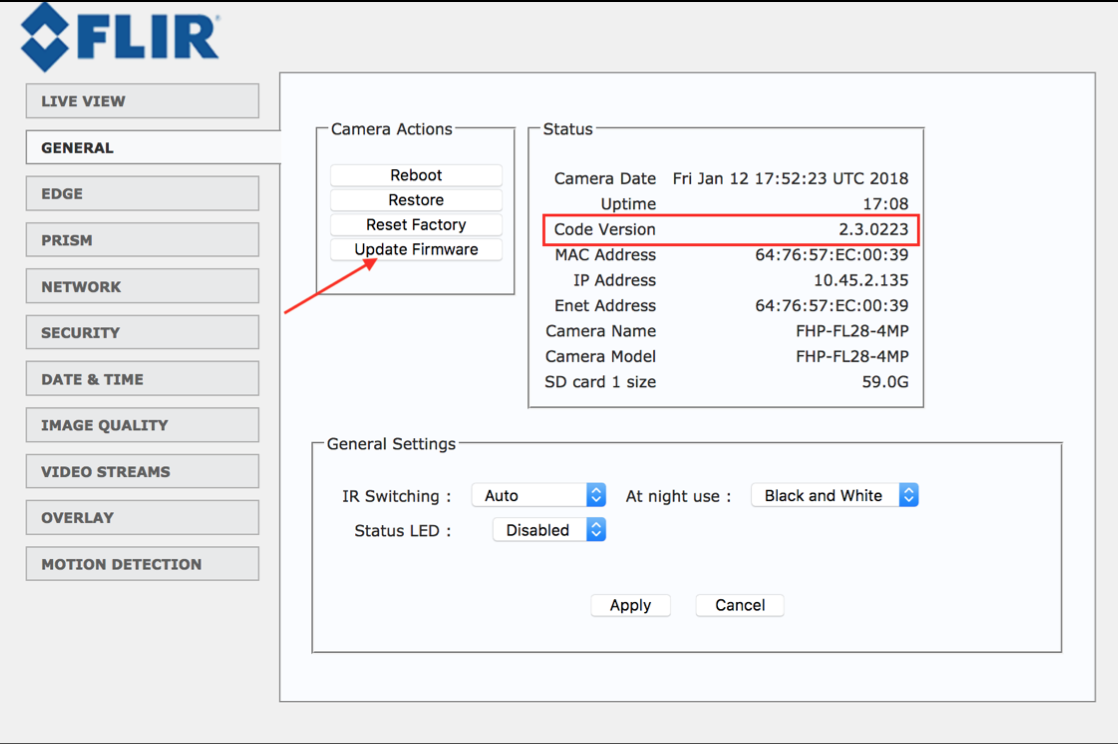
Step 7: Verify and update the camera’s firmware.
Currently, the latest version for S2 camera is 3.0.1227 and 2.3.0223 for S2L
If the camera has an outdated firmware version, make sure to update it.
CAMERA’S FIRMWARE CAN BE UPDATED FROM HERE:
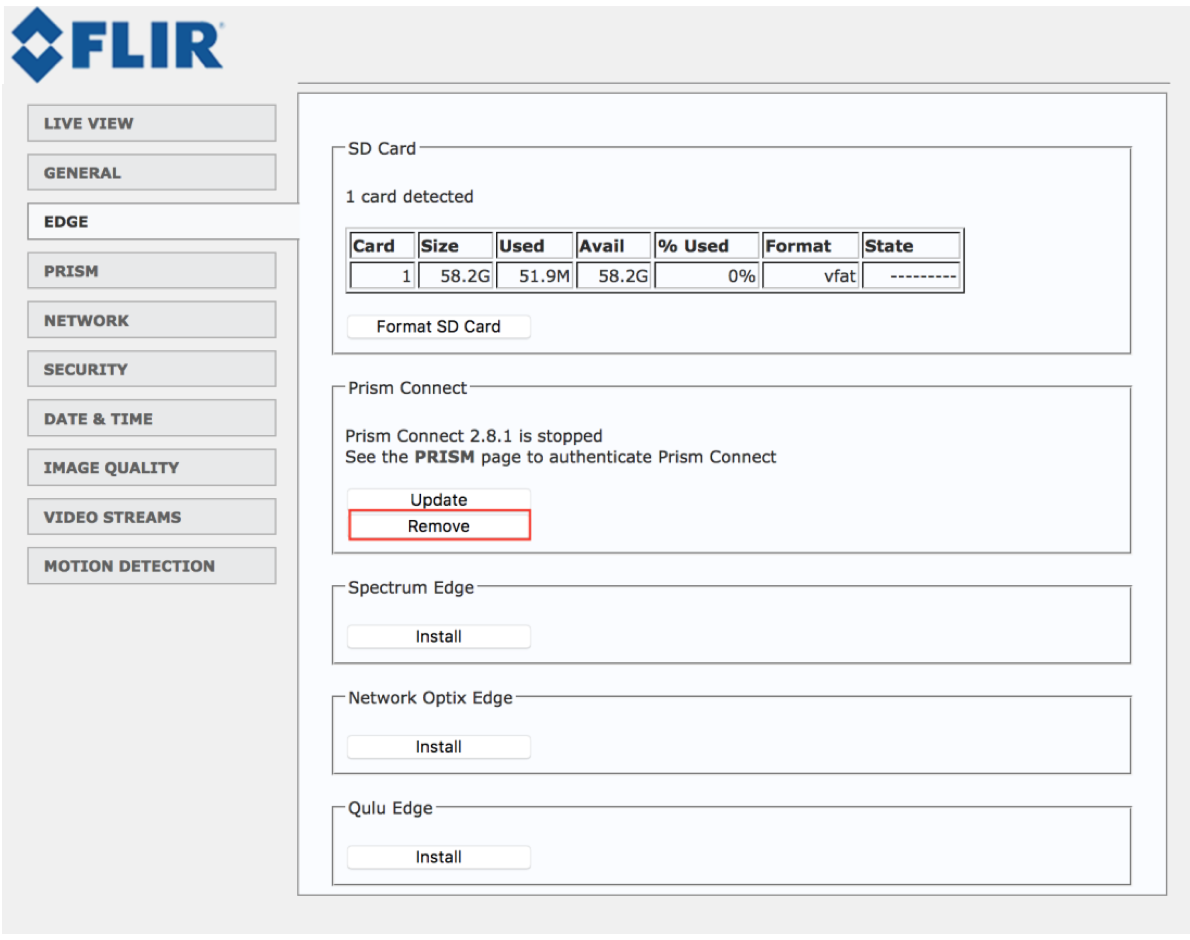
Step 8: Remove Ignite Prism Connect.
In the EDGE tab check if Ignite Prism Connect 2.8.1 is present. Remove it if 2.8.1 version is installed.
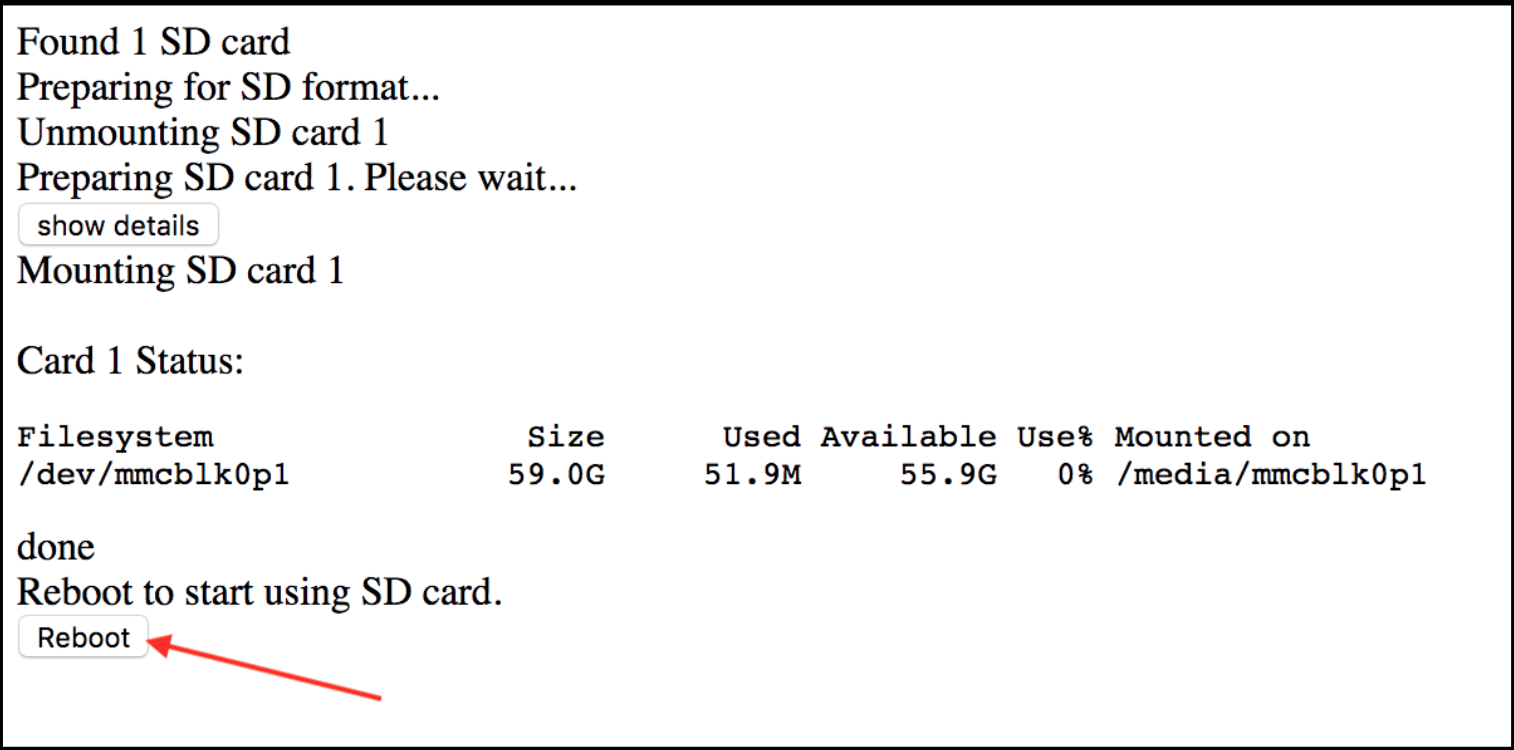
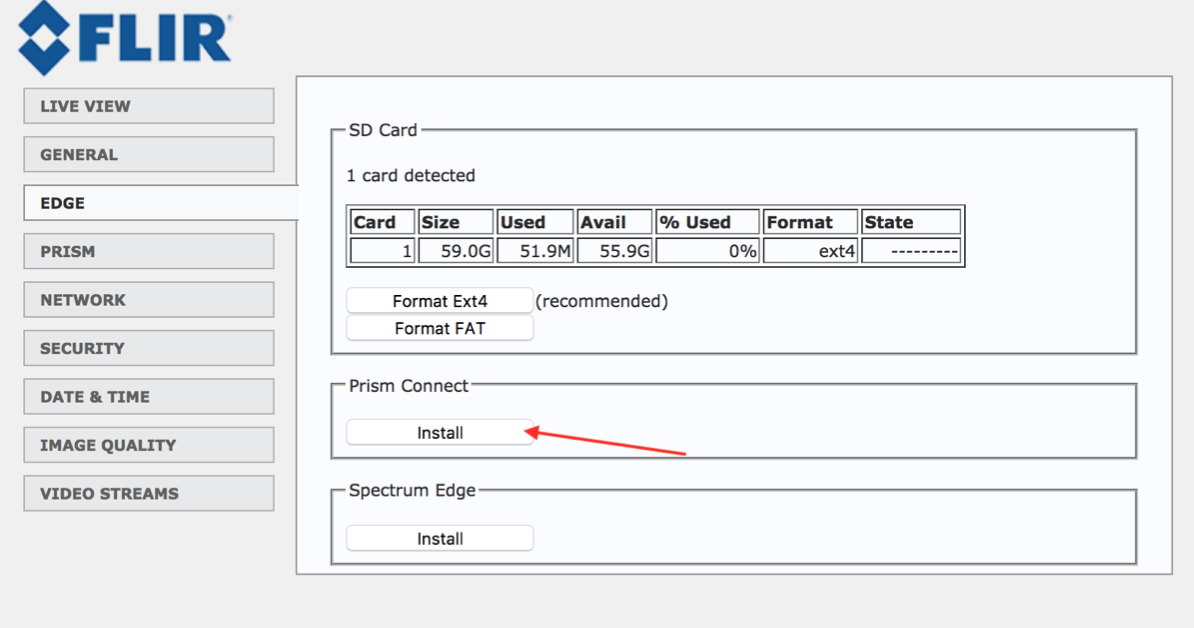
Step 9: Format an SD card.
Navigate to the EDGE page and Click on “Format Ext4.”
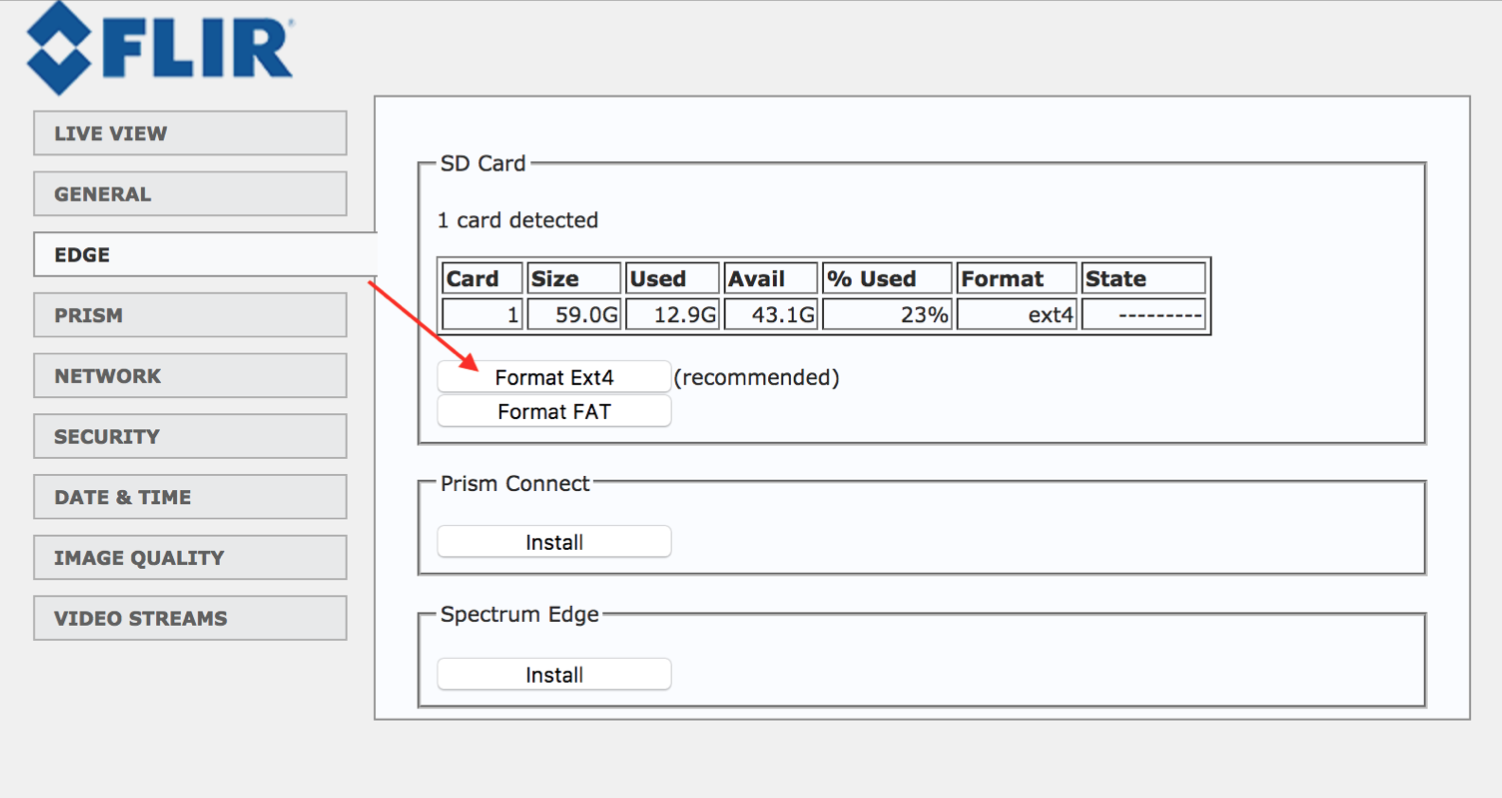
Wait until the format process is complete. Depending on the SD card size, it might take 1 to 5 minutes. Then reboot the camera.
Step 10: Adjust the camera view
Properly so it covers the area of interest. Simply go to the LIVE VIEW page.
Step 11: Date & Time Settings
Adjust date & time settings on the camera based on the local camera’s time.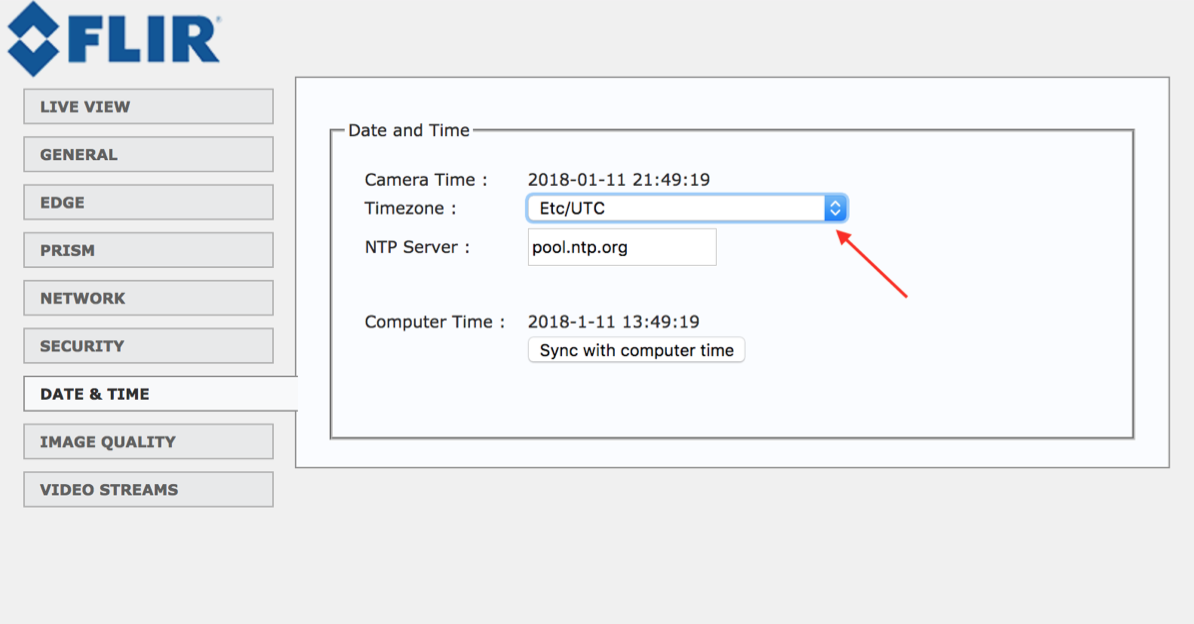
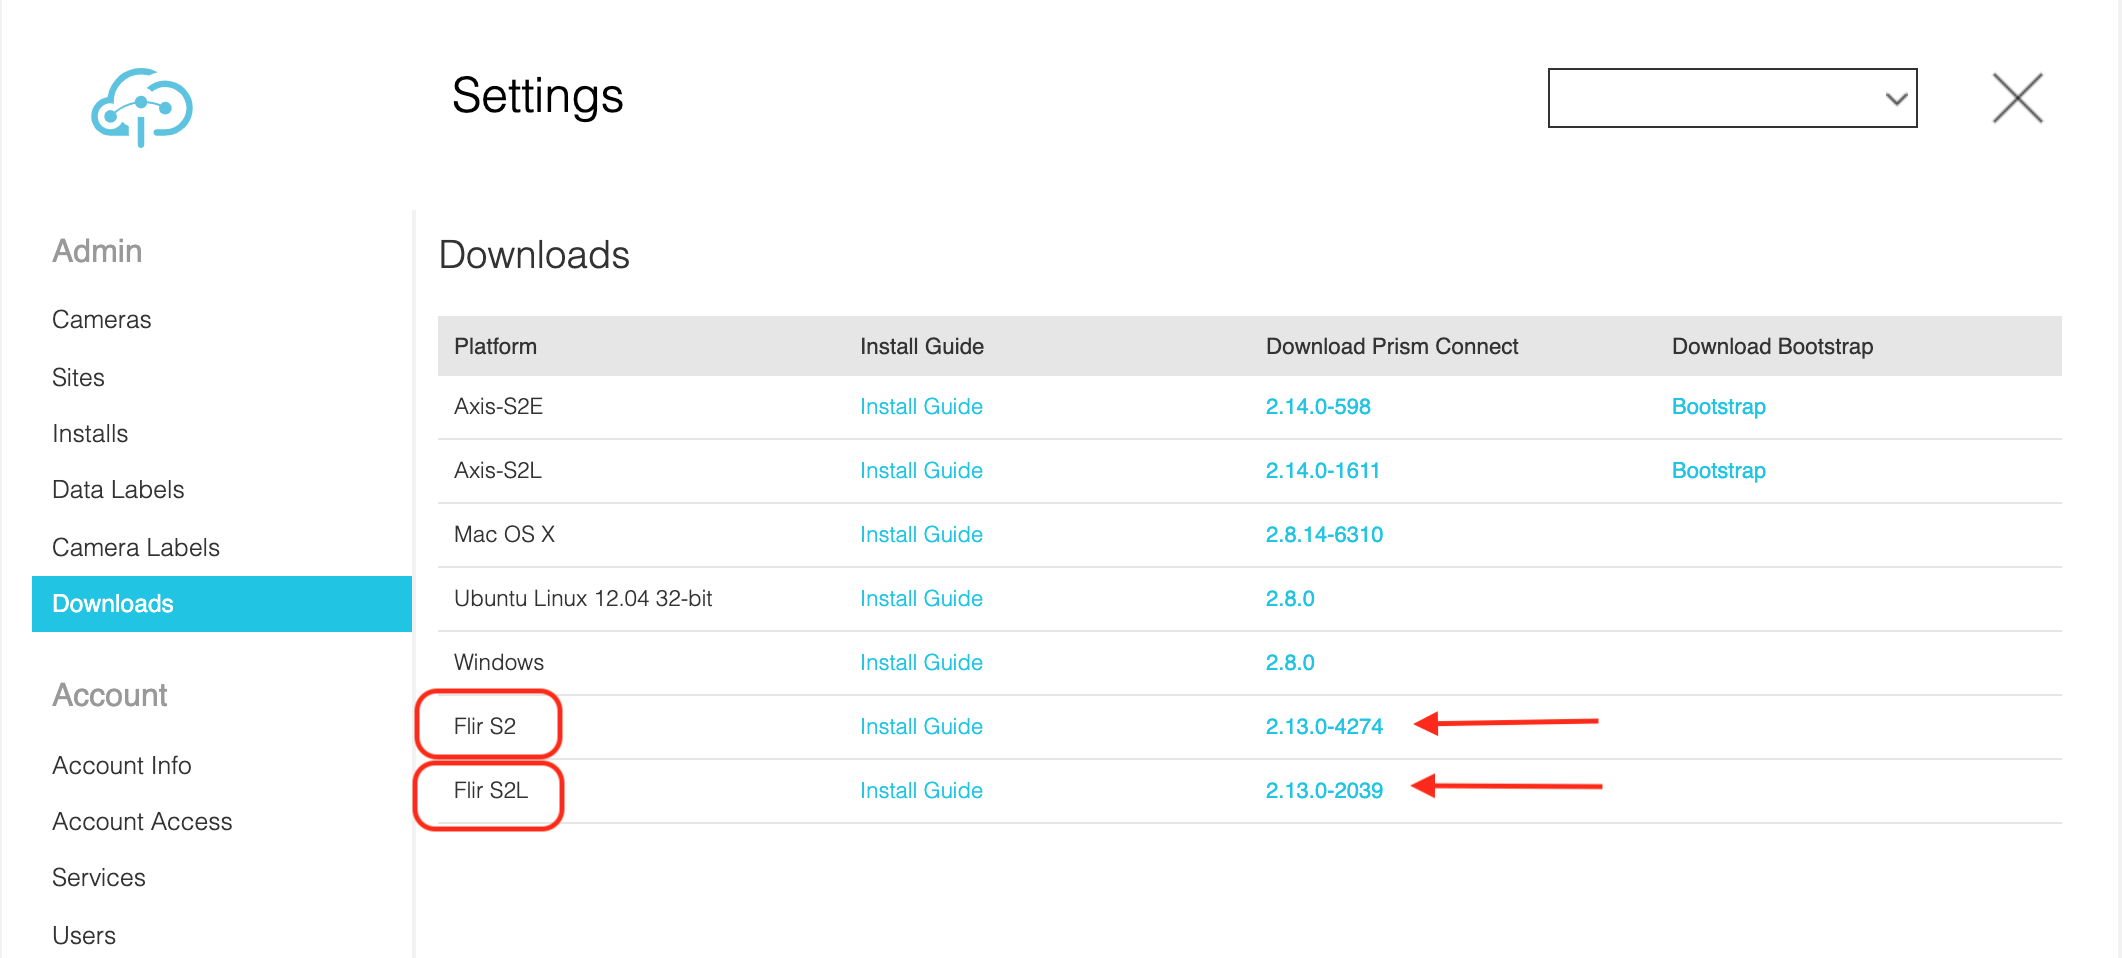
Step 12: Download Ignite Prism Connect software. Login to the app.igniteprism.com and go to the Downloads page.
FLIR S2 installation package is for camera models including YDV-FL28-3MP, YDV-FL4-3MP, YDV-FSH-3MP
FLIR S2L installation package is for camera models including FHP- FL28-4MP, FHP-FSH-5MP
Make sure to download the correct installation package for your camera.
Also, you can download Ignite Prism connect here:
FLIR S2 - https://app.igniteprism.com/download/isd/current/
FLIR S2L - https://app.igniteprism.com/download/isd-s2l/current/
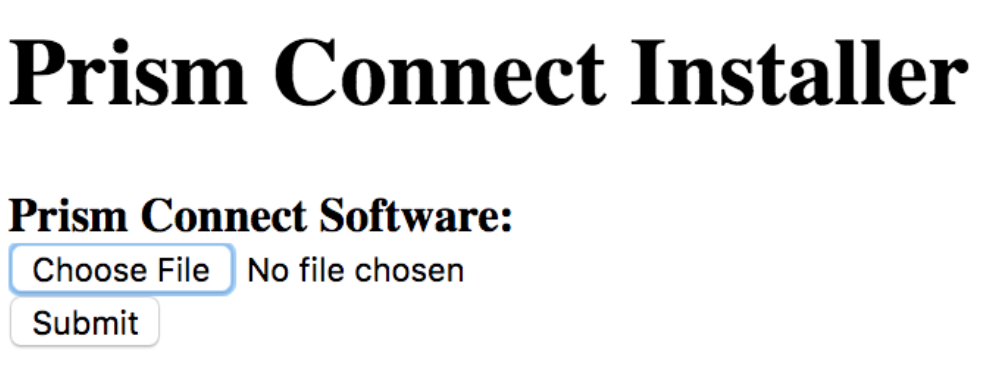
Step 13: Install Ignite Prism Connect.
Go to the EDGE tab and select the installation file to upload. Then click “Submit.”
Step 14: Authenticate Ignite Prism.
When Ignite Prism Connect is installed, you will see the message, “See the PRISM page to Authenticate Prism Connect.” Click on this link.
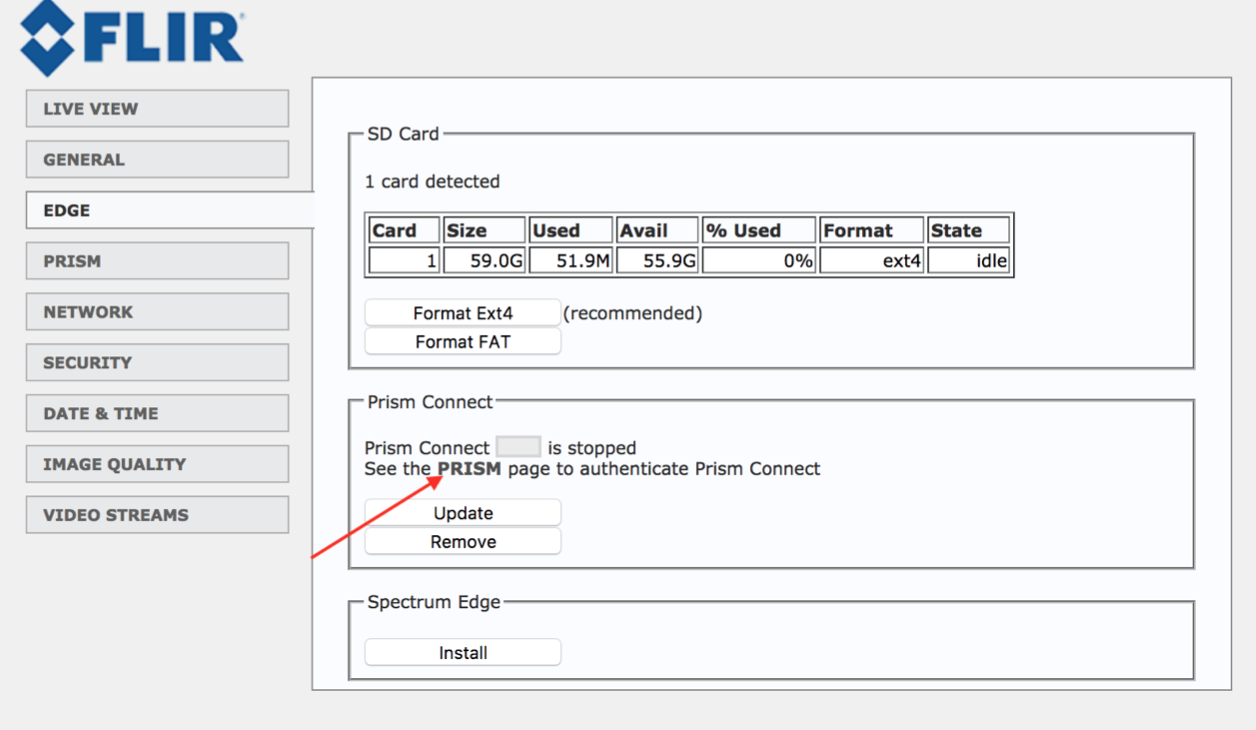
Enter the token to authenticate Ignite Prism Connect. When you’ve successfully authenticated Ignite Prism, the software will start automatically and will begin sending data to the cloud.

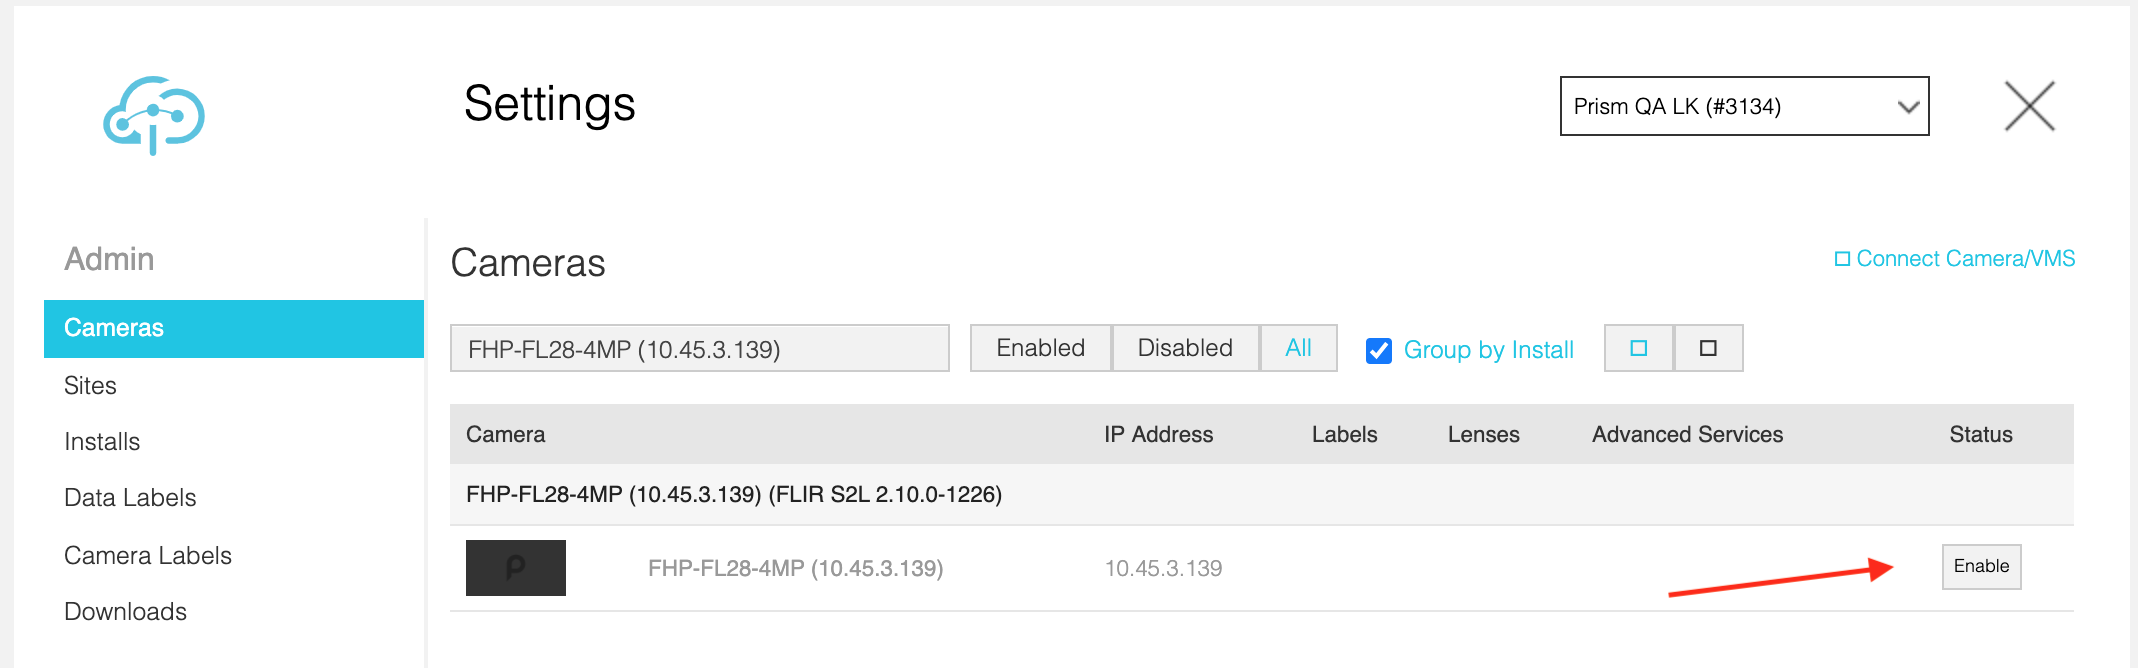
Step 15: Enable Your Ignite Prism Connect Camera:
Log in to your customer account at app.igniteprism.com
Go to the Settings page, select “Cameras” in the left-hand bar, and locate the new camera you have installed.
Click Enable. You’re all set!
IMPORTANT:
The camera will initially appear as a black box. After being enabled for approximately 30 minutes, the camera will generate a background image and its information will update on the Settings page. Do not make any configurations during this time.
Configure any desired lenses and advanced analytics.
Close the Settings interface and view the camera on the Cameras page.
If you do not see any output from the new camera, ensure that the camera is still powered up and verify the required outbound Internet connectivity.
TROUBLESHOOTING
Something not working? See the most frequently asked questions and get up-to-date tips and tricks on our support page at support.IgnitePrism.com.
Comments
0 comments
Please sign in to leave a comment.